Polkadot Staking Guide
Learn how to stake DOT token on the Polkadot blockchain using Polkadot JS and the Polkadot Browser Extension.

Polkadot main-net launched on May 26th and we are ready to receive your nominations for our two validators, which you can find under the following addresses:
15Sf82YbMQjtpgnExXFxzrwTsAXJKHVU9tzQV6WizAPo1dfL
165JpxmCRi28GwbFAjjrD74FTfGdLfHi1LUGMaYLjziDvi4r
For our services, we are charging a commission fee of 8%
In this guide you will learn how to:
- create a Polkadot Stash Account
- create a Polkadot Controller Account
- claim your DOT tokens
- stake your DOT tokens
- manage your Polkadot staking operations (e.g. unbond, bond more etc.)
Polkadot is now also supported on Ledger hardware wallets (Nano S & Nano X). We created a separate guide on how to use your Ledger device together with Polkadot JS, which you can find here.
Step 1: Create a Polkadot Stash Account
Since it is recommended by Polkadot for most users to use the Polkadot.js Browser Extension to create their addresses, we are focusing on this method. In case you want to explore alternatives, have a look here.
Make sure to install the Polkadot.js Browser Extension before you get started. You can download the extension for Chrome/Brave and FireFox.
- Once you successfully installed the extension, click on the orange little “P” button in your browser bar to open the interface. Then click “Create New Account”

2. Write down your mnemonic seed phrase and securely store it. Whoever has access to the mnemonic seed also has access to your funds! Check the box on the bottom and click “Next step”.

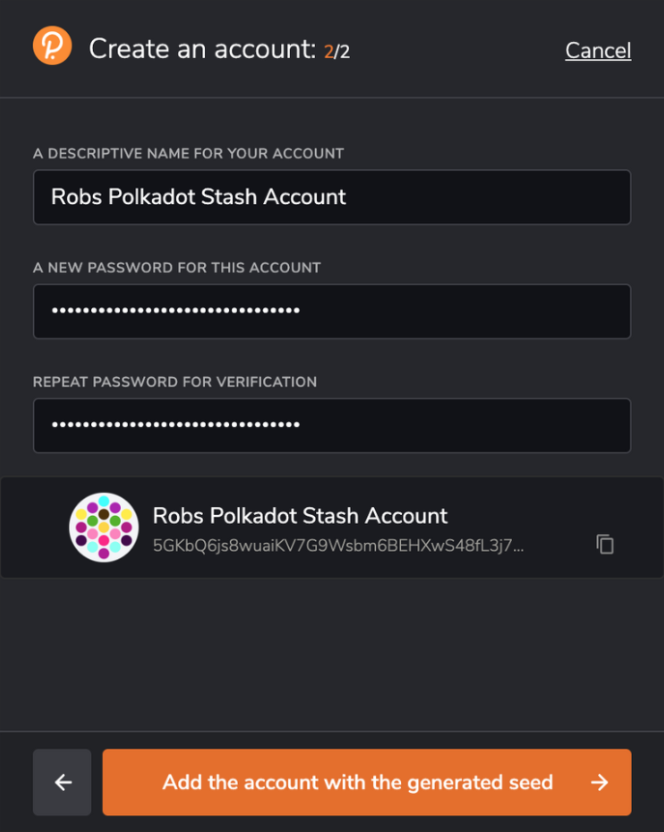
3. Choose a descriptive name for your Stash account as well as a strong password. Then click “Add the account with the generated seed”.
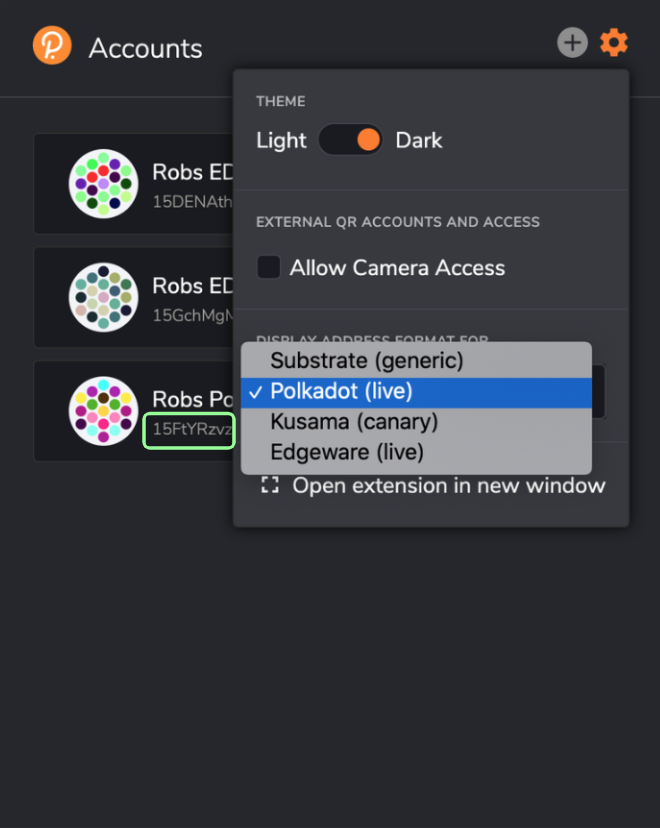
4. You will now see the created account in the Polkadot.js Browser Extension starting screen. Now you need to change the display of your address to a Polkadot mainnet address (recognizable by starting with a “1”). In order to do so, click the gear icon in the top right corner of the extension. Under “Display Address Format” choose “Polkadot (live)”. You will now see your address correctly displayed as a Polkadot mainnet address.

Congratulations, you have successfully created your Polkadot Stash account. You will now also find the address in Polkadot JS under “Accounts”.
Step 2: Create a Polkadot Controller Account
In order to successfully bond your funds and nominate your validator set, you need a separate account, namely your “Controller Account”. You will perform everyday staking operations like changing validators or claiming rewards using this account
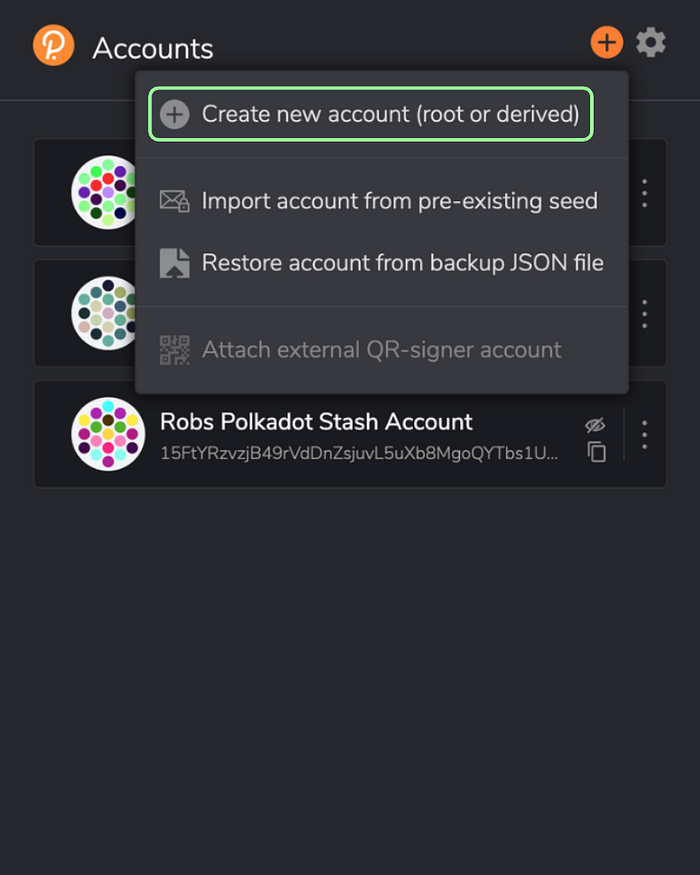
- To create your “Controller Account”, use the Polkadot browser extension. Click the plus icon in the top right corner. Then click “Create new account (root or derived)”.
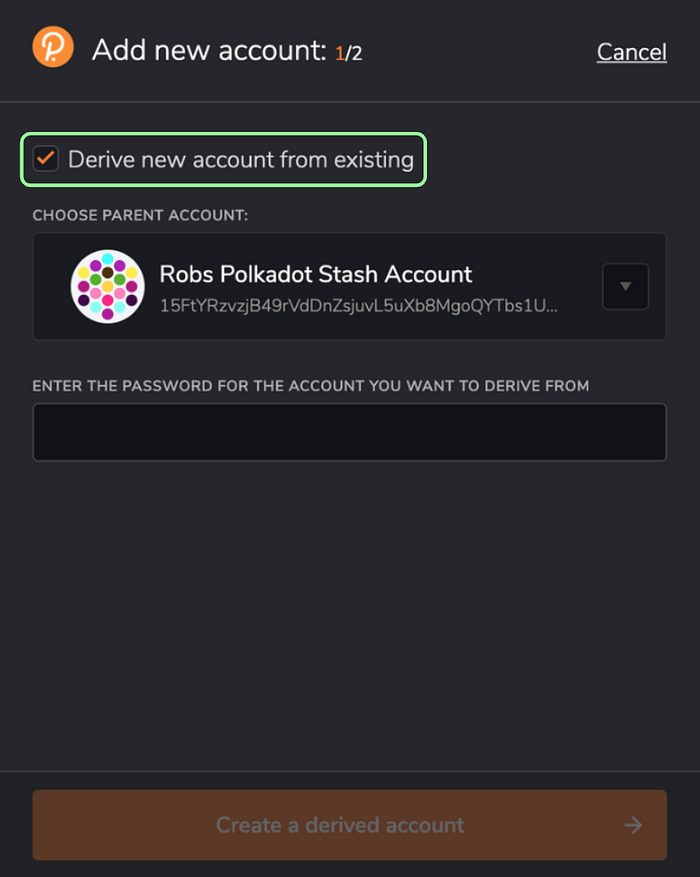
2. Now you have two options:
- derive the new account from your existing account: it will be accessible with the same seed (mnemonic phrase) of the account it was derived from
or
- create a new account with a new seed: the new account will be independent of the old one and have a separate seed (mnemonic phrase)
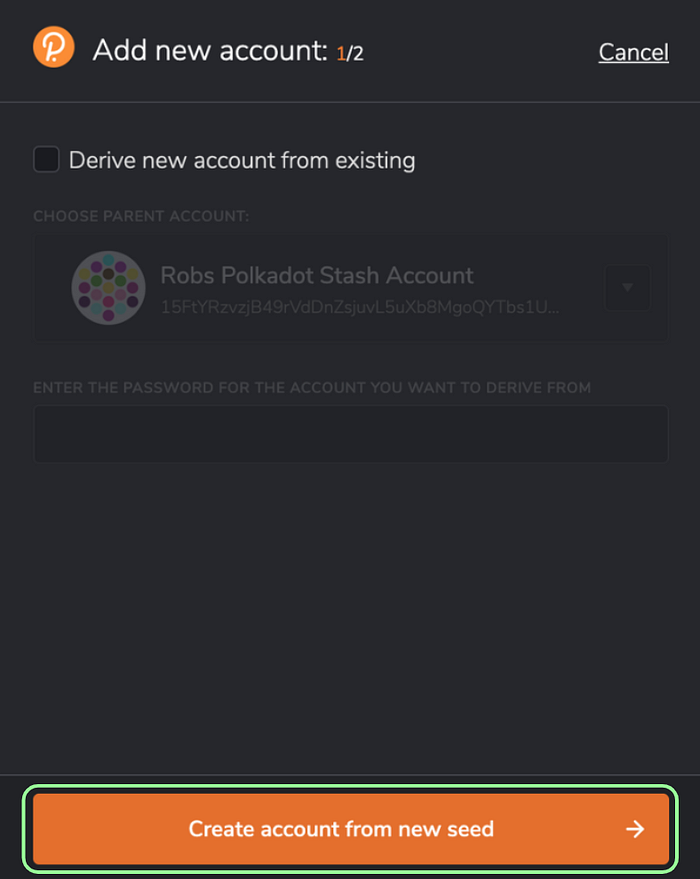
We prefer the second option because we want to have independent keys, which is why we have to uncheck the box at the top. Then, click “Create account from new seed”.
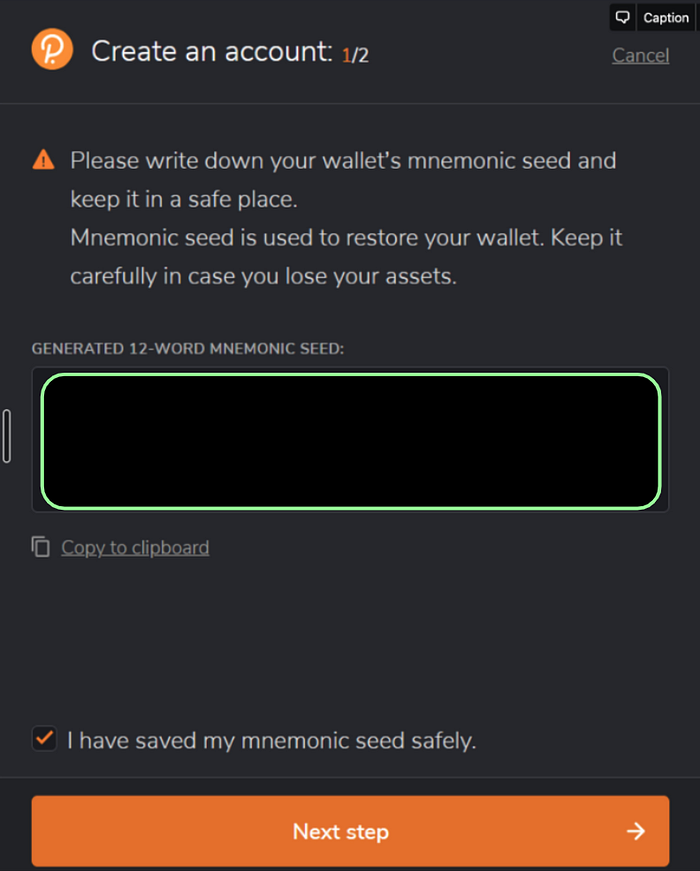
3. Write down your mnemonic seed phrase and securely store it. Whoever has access to the mnemonic seed also has access to your funds! Check the box on the bottom and click “Next step”.
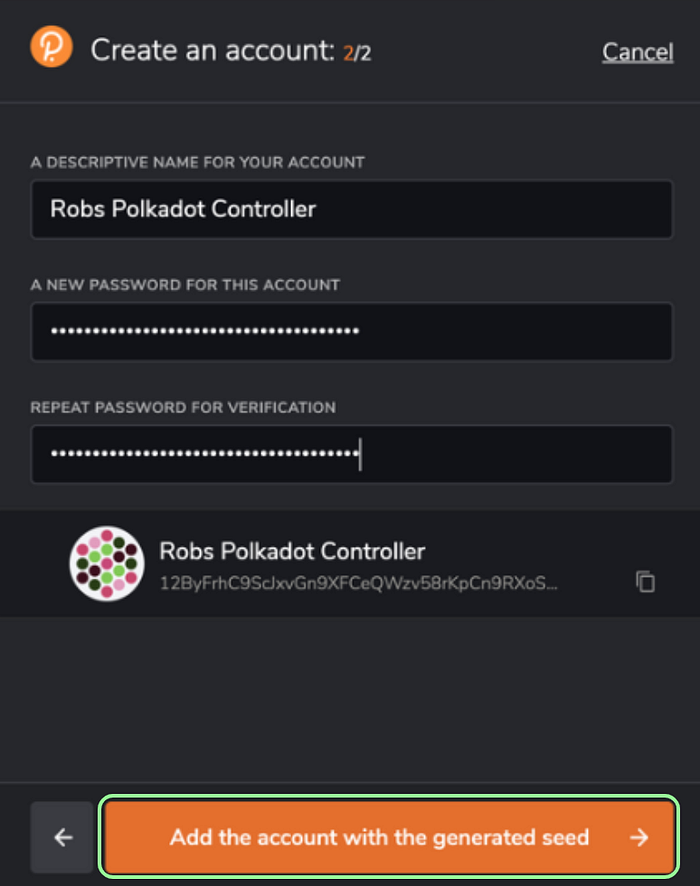
4. Choose a descriptive name for your Controller account as well as a strong password. Then click “Add the account with the generated seed”.
Congratulations, you successfully created your second Polkadot account! You will also find this account in the Polkadot JS under “Accounts”.
Step 3: Claim your DOT token
If you acquired DOT tokens in one of the pre-launch token sales, you need to claim & attest your tokens. For this process you need to have a Polkadot address, the Ethereum address you used for the token sale as well as My Crypto.
In case you did not participate in any pre-launch token sale and bought DOTs regularly on an exchange, you can skip “Step 3” and move on to “Step 4”.
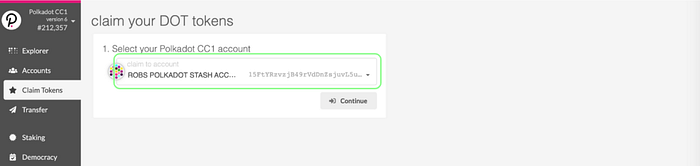
- Visit the Polkadot UI and click “Claim Tokens” in the menu on the left. Select the account you want to claim your tokens with from the drop-down menu and click “Continue”.
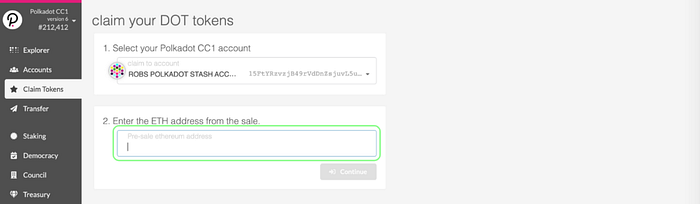
2. Enter the Ethereum Address through wich you participated in the token sale. Then click “continue”.
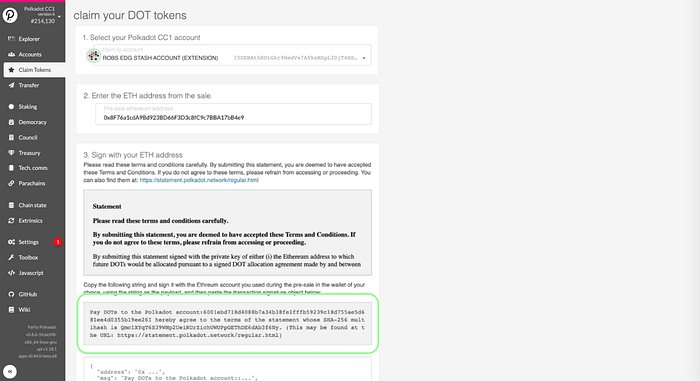
3. You will then see the message that you need to sign with your Ethereum address. Copy the message from the grey box to your clipboard.
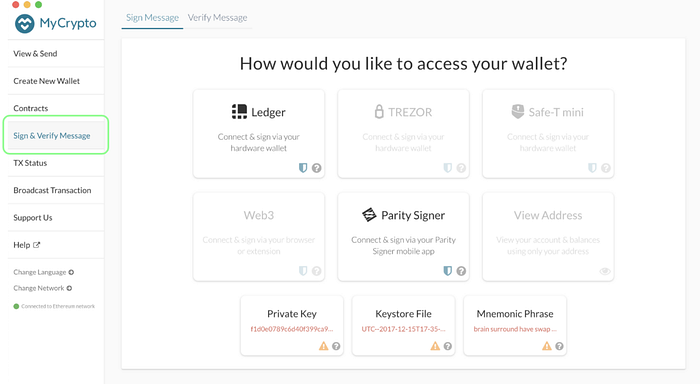
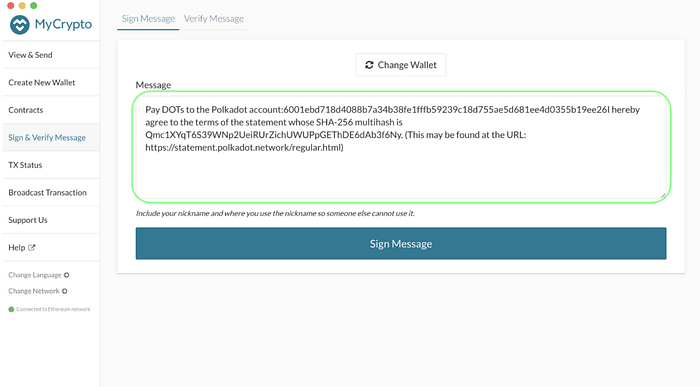
4. Download My Crypto and click “Sign & Verify Message” in the menu on the left. Then choose a method to unlock your wallet.
5. Paste the message you copied in Step 3 from the Polkadot UI to the message box in My Crypto. Then, click “Sign Message”.
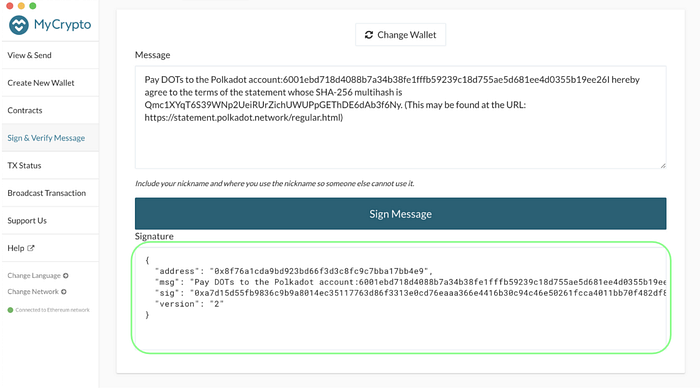
6. Your signature will be output as a JSON. Copy the whole output to your clipboard and go back to the claims section in Polkadot UI.
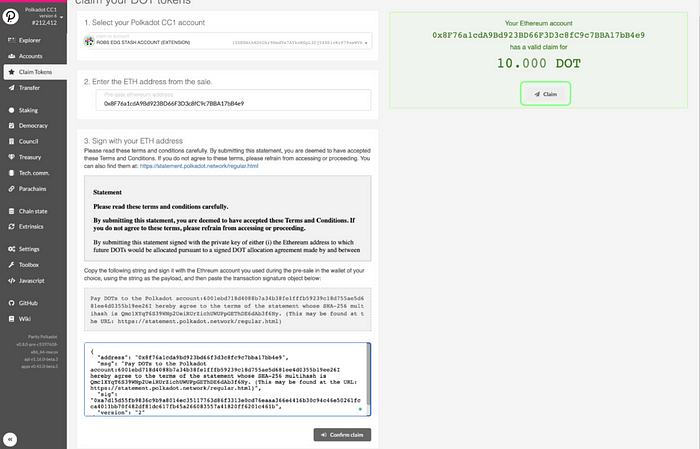
7. Paste the JSON signature output from My Crypto into the input box at the bottom of the Polkadot UI “Claim Tokens” section. Then, click “Confirm claim”.

8. You will then see the amount of DOTs you can claim with your Ethereum address. Click “Claim” in order to initiate the process.
In the pop-up, click “Submit (no signature)” in order to authorize the transaction and complete the claim.
Congratulations, your DOTs are now successfully claimed. You can now see your DOT balance in the “Accounts” section of the Polkadot JS website.
Step 4: Stake your DOTs
On the Polkadot JS website, make sure that you are connected to the Polkadot mainnet. You can change the network by clicking the network symbol in the top left corner of your screen.
Please note that the Polkadot JS UI has slightly changed — the menu bar is now to be found on the top and not on the left side. However, the processes described in this guide remain the same.
Before starting the Nomination process, send some funds from your Stash to your Controller account in order to cover transaction fees (2–3 DOTs should be plenty).
- The staking menu
To start the staking process, click “Staking” in the “Network” drop-down menu.
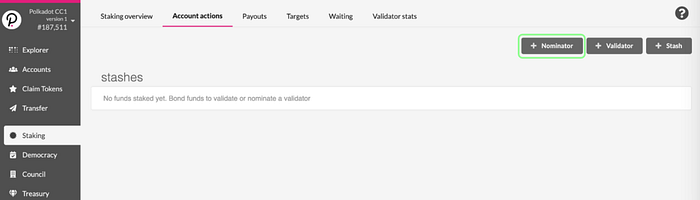
Click “Account actions” in order to start the nomination process.

2. Define your accounts
Now click the “+ Nominator” — button.
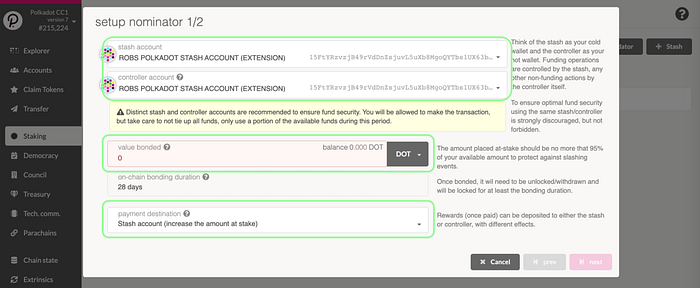
3. Bond your DOTs
[Update] Token transfers are now enabled, so you can choose a separate account for “Controller Account”.
Choose the amount of DOTs you want to use for staking under “value bonded”. Make sure to leave some funds in your Stash account. Bond a max. of 95% of your tokens so that you are still able to pay for transaction fees.
Choose a destination account for your rewards under “payment destination”. Then click “next” to bond your token.
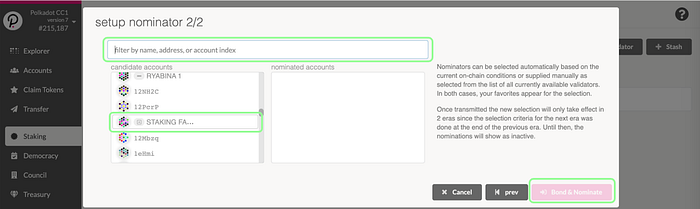
4. Choose validators
You can nominate up to 16 validators. Simply select the validators of your choice by clicking on them in the left box, make sure to have the auto-selection turned off by switching the button below “nominated accounts”. You can unselect them from the right box by clicking on them again. Alternatively, you can also use the search bar at the top to look for specific validators by name or address. Then click “Bond & Nominate”.
Our validator addresses:
15Sf82YbMQjtpgnExXFxzrwTsAXJKHVU9tzQV6WizAPo1dfL
165JpxmCRi28GwbFAjjrD74FTfGdLfHi1LUGMaYLjziDvi4r
Please note that you cannot specify the amount delegated to a particular validator. Your bonded DOTs will be spread out among the validators you selected according to the NPoS algorithm.
5. Bond & Nominate
Click “Sign & Submit” in order to conclude your nomination.
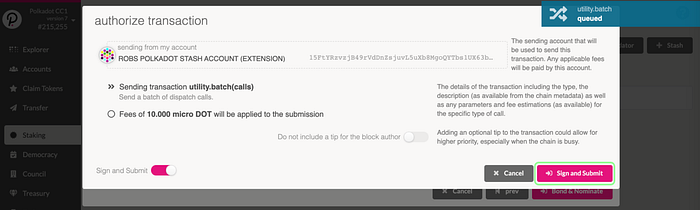
Congratulations, your are now a Nominator on the Polkadot network!
Managing your Polkadot Staking Operations
You can manage your staking operations with Polkadot JS. In the “Staking” menu, click “Account Actions” and then click the three dots on the very right to perform the following operations:
- Bond more funds
- Unbond
- Change controller account
- Change reward destination
- Set nominees
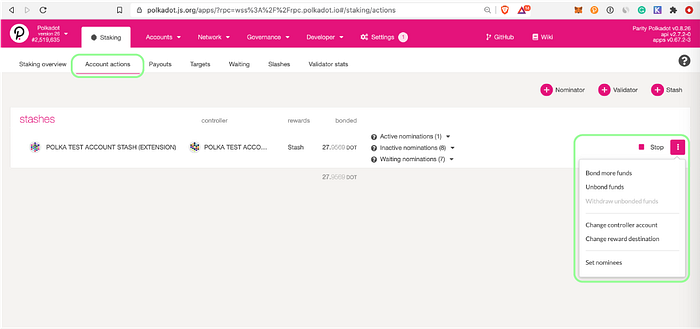
What are “Active Nominations”, “Inactive Nominations” or, “Waiting” nominations”?
“Active nominations” & “Inactive nominations” are the validators of your nominations that are currently in the active validator set. In general, your only one validator will be shown as “active”. That is because the algorithm used to distribute your stake is optimized so that each validator in the set roughly has the same amount of stake backing him/her. Your stake is therefore usually only backing one of the validators you nominated.
“Waiting nominations” are the validators that are currently not in the active set.
Let’s connect
Thanks for your trust and nomination. In case you have any questions, need more assistance or simply want to chat, always feel free to reach out to us via Telegram, eMail, Twitter or LinkedIn!